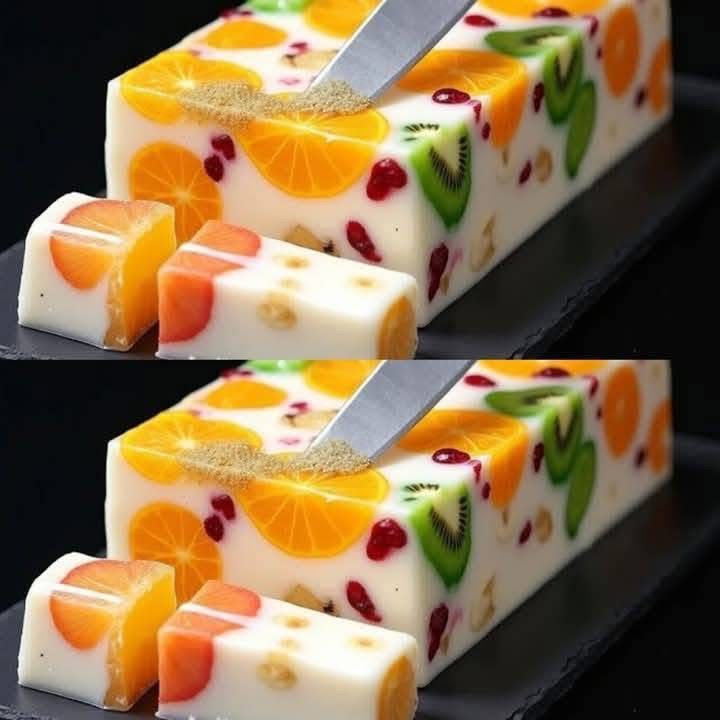
Here’s a delightful Refreshing Fruit Jelly Milk Cake recipe! It features a buttery biscuit base, a creamy vanilla milk layer, and a vibrant, wobbly fruit jelly topping. Perfect for summer gatherings.
Yields: 9-inch square or round cake (about 9-12 servings)
Prep Time: 45 minutes (+ 6-8 hours chilling/overnight best)
Ingredients
1. Biscuit Base
150g (5.3 oz) Digestive biscuits or Graham crackers (about 10-12 biscuits)
60g (4 tbsp) Unsalted butter, melted
1 tbsp Sugar (optional, depending on biscuit sweetness)
2. Milk Layer
250ml (1 cup) Full-fat milk
250ml (1 cup) Heavy cream (whipping cream, min 35% fat)
60g (5 tbsp) Granulated sugar
10g (about 1.5 packets) Unflavored powdered gelatin
45ml (3 tbsp) Cold water (for gelatin)
1 tsp Pure vanilla extract or paste
3. Fruit Jelly Layer
350g (about 2 cups) Fresh ripe fruit, chopped (e.g., Mango, Strawberries, Raspberries, Peaches, Kiwi – see notes)
100g (1/2 cup) Granulated sugar (adjust based on fruit sweetness)
250ml (1 cup) Water
10g (about 1.5 packets) Unflavored powdered gelatin
45ml (3 tbsp) Cold water (for gelatin)
1 tbsp Lemon or Lime juice (brightens flavor)
Optional Garnish
Extra fresh fruit slices
Mint leaves
Edible flowers
Equipment
9-inch springform pan OR deep square dish (loaf pan too small)
Food processor or zip-top bag + rolling pin
2 medium saucepans
Whisk
Spatula
Fine mesh sieve
Instructions
1. Prepare the Base
Line the bottom of your pan with parchment paper. Lightly grease the sides.
Crush biscuits into fine crumbs (processor or bag + rolling pin).
Mix crumbs thoroughly with melted butter (and sugar if using). Press firmly and evenly into the bottom of the pan.
Refrigerate while preparing the milk layer.
2. Make the Milk Layer
Bloom Gelatin: Sprinkle 10g gelatin over 3 tbsp cold water in a small bowl. Stir and let sit for 5-10 minutes until spongy.
Heat Milk Mixture: Combine milk, cream, and sugar in a saucepan. Heat over medium-low, stirring constantly, until steaming hot but NOT boiling (about 160°F/70°C). Sugar should be dissolved. Remove from heat.
Dissolve Gelatin: Whisk the bloomed gelatin into the hot milk mixture until completely dissolved and smooth. Stir in vanilla extract.
Cool Slightly: Let the mixture cool for 10-15 minutes, stirring occasionally, until lukewarm (thickens slightly but still pourable).
Assemble Milk Layer: Pour the lukewarm milk mixture over the chilled biscuit base. Tilt pan gently to level. Carefully return to the refrigerator. Chill for at least 1.5-2 hours, or until completely set and firm to the touch. (This layer MUST be set before adding jelly!)
3. Prepare the Fruit Jelly Layer
Bloom Gelatin: Sprinkle 10g gelatin over 3 tbsp cold water in a small bowl. Stir and set aside.
Make Fruit Puree: Combine chopped fruit, sugar, and 1 cup water in a clean saucepan. Bring to a gentle simmer over medium heat. Cook, stirring occasionally, for 5-8 minutes until fruit is very soft and sugar dissolved.
Blend & Strain: Carefully puree the hot fruit mixture using an immersion blender or transfer to a stand blender (vent lid!). Strain the puree through a fine-mesh sieve into a clean bowl or jug, pressing with a spatula to extract maximum liquid. Discard solids. Stir in lemon/lime juice.
Dissolve Gelatin: While the fruit puree is still very hot, whisk in the bloomed gelatin until completely dissolved and smooth.
Cool Significantly: Allow the fruit jelly mixture to cool at room temperature for 20-30 minutes, stirring occasionally, until it’s lukewarm to the touch (around body temperature). (Pouring hot jelly will melt the milk layer!)
4. Assemble the Jelly Layer & Final Chill
Pour Jelly: Once the fruit jelly mixture is lukewarm, slowly and gently pour it over the completely set milk layer. Tilt the pan slightly if needed to distribute evenly.
Chill Completely: Carefully transfer the cake to the refrigerator. Chill for at least 4-6 hours, or preferably overnight, for all layers to set firmly.
5. Serve
Unmold: For a springform pan: Run a thin, hot knife (dipped in hot water, dried) around the edge. Release the clasp. For a dish: Serve directly from it, or use parchment overhang to lift carefully.
Cut: Dip a sharp knife in hot water and wipe dry between each cut for clean slices.
Garnish: Top with fresh fruit slices, mint, or flowers.
Store: Keep refrigerated, covered, for up to 3 days.
Key Tips for Success
Gelatin Power: Use powdered gelatin specified in grams/packets. Sheet gelatin (approx 8-9 sheets total) can be used (bloom in cold water, squeeze, dissolve in hot liquid).
Cooling is Crucial: Ensure both the milk layer is SET and the jelly layer is LUKEWARM before pouring. Hot jelly = melted milk layer disaster!
Fruit Choice: Use ripe, flavorful fruits. Avoid: Pineapple, papaya, kiwi (raw), figs (contain enzymes that prevent gelatin setting unless cooked thoroughly first – the simmering here should deactivate them, but best avoided if unsure). Berries, mango, peaches, plums are great.
Smooth Jelly: Straining the puree is essential for a clear, smooth, professional-looking jelly top.
Patience: Don’t rush the chilling times. Overnight is best for perfect texture and clean slicing.
Vegetarian Option: Substitute gelatin with Agar-Agar powder. Use about 1 tsp per cup of liquid for each layer (bloom in cold liquid, bring mixture to a full boil for 1-2 min, cool slightly before pouring). Note: Agar sets firmer and faster.
Enjoy this stunning, light, and refreshing dessert! The creamy milk layer perfectly complements the sweet-tart fruit jelly and crunchy base.
-
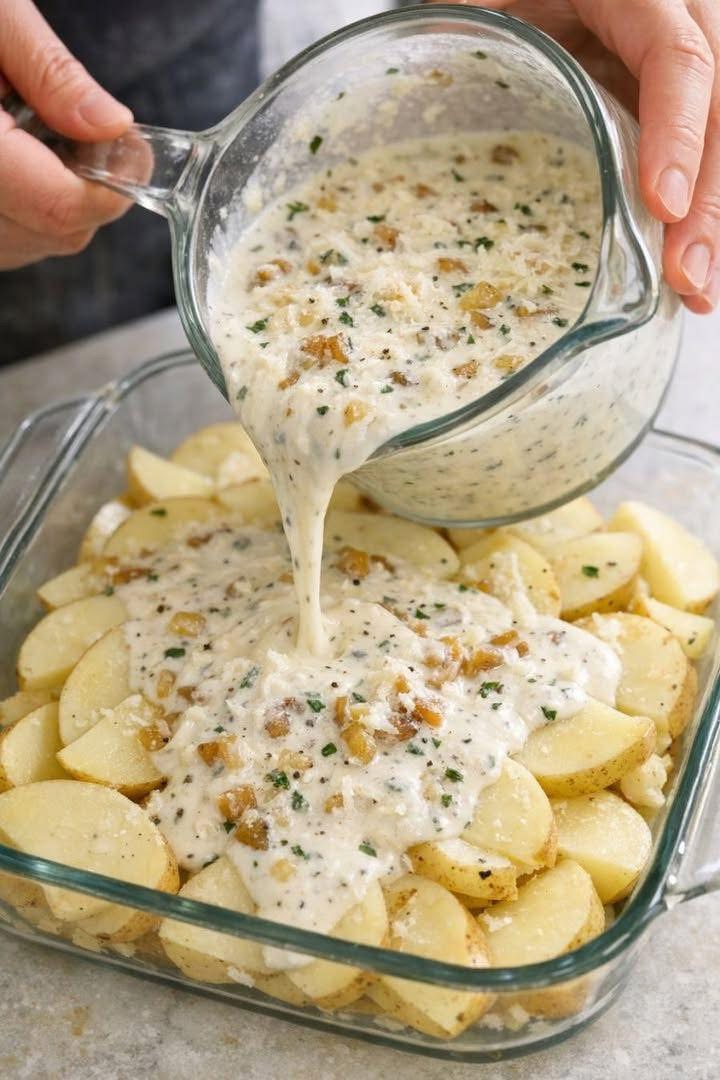
The Ultimate Cozy Potato Bake
When the air turns cool or your body simply demands comfort, few dishes answer as confidently as a creamy potato bake. This is not flashy food. It does not try … Read more
-
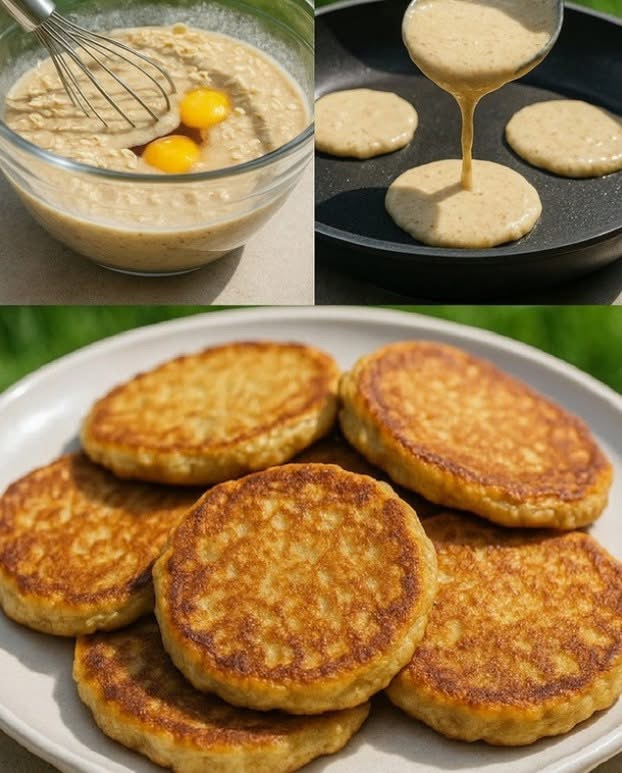
Vanilla oatmeal pancakes
Flourless Vanilla Oatmeal Pancakes are a simple, nourishing breakfast made without traditional wheat flour. Instead, they rely on oats, eggs, and banana to create structure and natural sweetness. The result … Read more
-
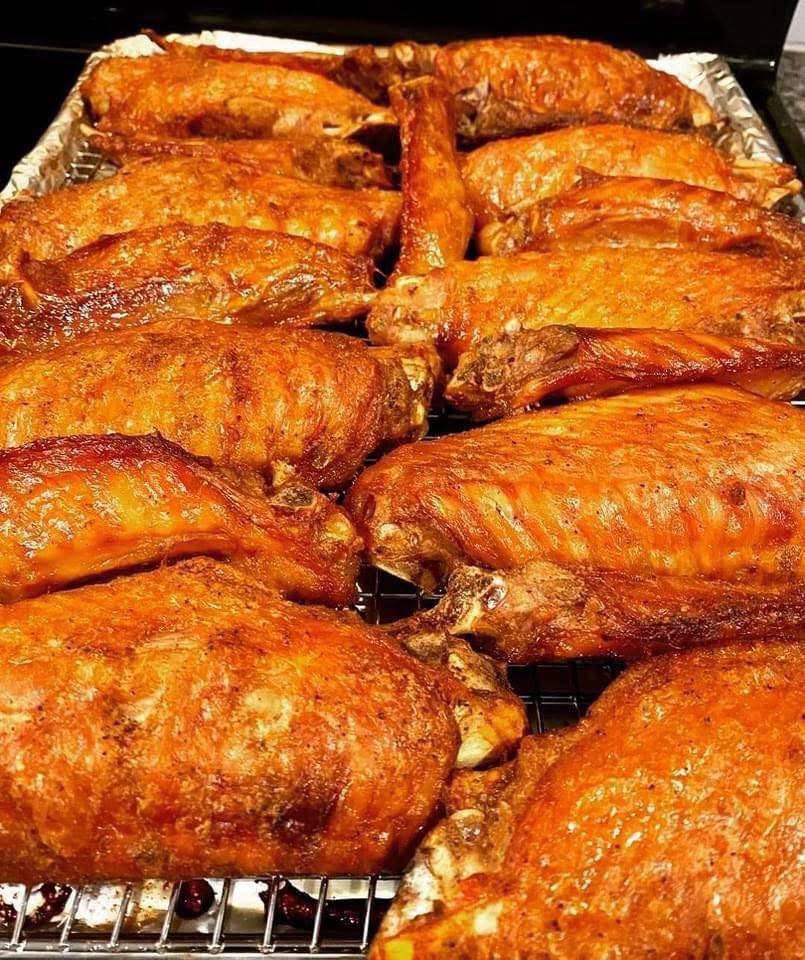
Smothered Turkey Wings Recipe
Smothered Turkey Wings Recipe Introduction When it comes to classic Southern comfort food, nothing quite compares to a hearty Smothered Turkey Wings Recipe. This dish is the very definition of soul … Read more