Of course! This is a wonderful classic bread recipe.
Here is the complete preparation method with the missing steps filled in, along with essential tips and instructions for baking and storage.
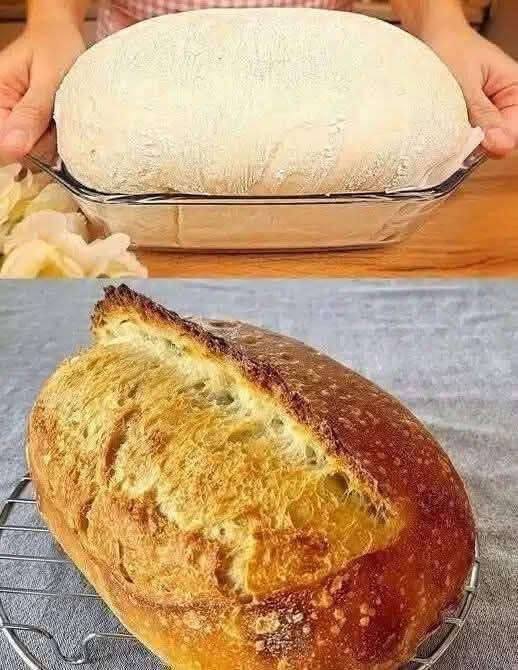
Classic Homemade Bread: Simple, Soft, and Delicious
Ingredients
Dry Yeast: 10 grams (1 packet)
Warm Water: 200 ml (1 glass) for the yeast
Flour: 720 grams (6 cups) + 120 grams (1 cup) for initial mixing
Salt: 10 grams (1 teaspoon)
Warm Water: 400 ml (additional, for the main dough)
Egg Yolk: 1 for the glaze
Milk: 1 tablespoon for the glaze
Instructions
Activate the Yeast: In a large bowl, dissolve the dry yeast in 200 ml of warm water (ideally around 105-115°F or 40-46°C).
Stir until dissolved. Let it sit for 5-10 minutes until it becomes frothy. This confirms the yeast is active.
Make the Sponge: Mix the 120 grams (1 cup) of flour into the yeast mixture until a smooth, batter-like consistency forms.
This is your “sponge.” Cover the bowl with a clean cloth or plastic wrap and let it rest for 15 minutes. It will become puffy.
Make the Dough: Pour the 400 ml of warm water into the sponge and mix well. Gradually add the 720 grams (6 cups) of flour and the salt. Mix until a shaggy dough forms.
Knead: Turn the dough onto a lightly floured surface and knead for 8-10 minutes. Alternatively, knead in a stand mixer with a dough hook for 5-7 minutes.
The dough is ready when it is soft, smooth, elastic, and only slightly sticky. It should spring back slowly when poked.
First Rise: Place the kneaded dough in a lightly oiled bowl, turning it once to coat. Cover tightly with plastic wrap or a damp cloth.
Let it rise in a warm, draft-free place for 1-2 hours, or until doubled in size.
Shape: Gently punch down the dough to release the air. Turn it out onto a lightly floured surface. Divide it into two equal parts.
Gently roll each piece into a tight ball, pinching the seams on the bottom. Cover and let them rest for 10 minutes to relax the gluten.
For Loaf Pans: After resting, flatten each ball into an oval shape and roll it up tightly into a log. Pinch the seam closed and place it seam-side down into a greased 9×5 inch loaf pan.
For Round Loaves (Boule): Simply re-shape the rested balls into tight rounds and place them on a parchment-lined baking sheet.
Second Rise: Cover the shaped loaves and let them rise again for 45-60 minutes, or until nearly doubled and puffy.
Preheat and Glaze: While the loaves rise, preheat your oven to 375°F (190°C). Whisk together the egg yolk and 1 tablespoon of milk.
Just before baking, gently brush this mixture over the top of the risen loaves. This will give them a beautiful, glossy, golden-brown crust.
Optional: You can slash the top of the loaves with a sharp knife or razor blade (lamé) about ¼-inch deep before baking. This controls where the bread expands and makes it look professional.
Bake: Place the loaves in the preheated oven and bake for 30-40 minutes, or until the crust is deep golden brown and the bread sounds hollow when tapped on the bottom.
An internal thermometer should read 190-200°F (88-93°C).
Cool: This is a crucial step! Remove the bread from the pans immediately and let it cool completely on a wire rack for at least 1-2 hours before slicing. Slicing too early will result in a gummy texture.
Recipe Notes & Tips
Water Temperature: The water must be warm, not hot. Too hot will kill the yeast. It should feel warm to the touch, like pleasant bath water.
Flour: The exact amount of flour can vary based on humidity. Add the final cups gradually.
The dough should be soft and slightly tacky, but not so sticky that it sticks to your hands and the bowl uncontrollably.
Rising Spot: To create a warm environment for rising, you can:
Place the bowl in an oven with the light on (but the oven OFF).
Set the bowl on top of a preheating oven.
Storage: Once completely cool, store bread in a paper bag at room temperature for 2-3 days for the best crust.
For longer storage (up to a week), place in a plastic bag; the crust will soften but the bread will stay fresh.
It also freezes beautifully for up to 3 months. Slice it first for easy toasting.
Serving Suggestions
Fresh: Simply sliced and slathered with butter, jam, or honey.
Sandwiches: Perfect for classic peanut butter & jelly, turkey clubs, or grilled cheese.
Toast: Makes incredible morning toast or garlic bread to accompany pasta.
Soup & Salad: The ultimate side for a warm bowl of soup or a fresh salad.
Enjoy the incredible smell and taste of your homemade bread
-

Vanilla oatmeal pancakes
Flourless Vanilla Oatmeal Pancakes are a simple, nourishing breakfast made without traditional wheat flour. Instead, they rely on oats, eggs, and banana to create structure and natural sweetness. The result … Read more
-

Smothered Turkey Wings Recipe
Smothered Turkey Wings Recipe Introduction When it comes to classic Southern comfort food, nothing quite compares to a hearty Smothered Turkey Wings Recipe. This dish is the very definition of soul … Read more
-

Slow Cooker 4-Ingredient Sausage and Cabbage
Slow Cooker 4-Ingredient Sausage and Cabbage When it comes to comfort food that requires minimal effort but delivers maximum flavor, Slow Cooker 4-Ingredient Sausage and Cabbage stands in a category of its … Read more